
A rookie testing the Microsoft Power Virtual Agents preview and adding it to Microsoft Teams
- Amanda Sterner

- Nov 27, 2019
- 6 min read
Updated: May 2, 2022
Updated 26th of January 2020 with information about licences.
Microsoft talks a lot about citizen developers, but I still haven’t seen this in real life and to be frank I think both PowerApps and Power Automate can be hard to understand sometimes. But that doesn’t stop me – especially when I heard during Microsoft Ignite that I easily can create my bots without code! Of course I want a bot!
Microsoft Power Virtual Agents is a new tool where you can create and maintain bots with a no-code interface – very exciting right? When I heard that Microsoft Power Virtual Agents is available in preview, I thought hey, let’s see how easy this actually is!
Microsoft Power Virtual Agents might mostly be for virtual agents for companies who use Dynamics 365 and sell stuff, but I mean all companies have processes we could create a QaA bot for.
Follow along when I try to create a no-code bot and add it to Microsoft Teams. For this simple test I will see if I can get the bot to ask me a couple of questions.
1. Open https://powervirtualagents.microsoft.com/ and sign up for the preview. I did it in my tenant where I’m the global admin, but it should also work if you test it in a tenant where you aren’t an admin as long as the organization accepts custom apps
2. When you’re logged in (here’s the link if it doesn’t redirect you https://powerva.microsoft.com/) you will directly be prompted to create a new bot

3. The bot is created! Microsoft will set you in the right direction by giving lot of helpful options such as giving links to documents

I clicked X and felt that Customize your greeting sounded like a great start 😊 There are basically three main settings for your bot: deciding what it should do, publish it and monitor the performance

4. This is basically your bot and it already has a lot of things there from the beginning, such as responding in a lot of different ways of saying hello

The first thing I wanted to change was to change the boring welcome text, let’s make it a little bit friendlier 😉. Just click in the message box and write whatever you feel like

To add more steps, you hoover over the line and a + will appear, when clicking it you’ll get a bunch of options.

I’ve noted there are different options if you click a + in the middle or in the end. If you do it in the end of the flow you can add redirect to another topic but let’s go back to topics soon.

I think it makes sense if my bot asks a question after the initial greeting, I’ll pick Ask a question

I did the bare minimum and added a question and two options 😊 You can save the response and do more advanced things but that’s too much for now ha-ha. Adding two options in a question will create two branches in my bot flow chart. So, it’s really easy to see what’s going on.

Another thing I like is that I whenever can test my bot by clicking Test your bot. That’s perfect for me, so I understand where things stop working <3

When a part on my bot flow works it’s marked with a check and a green bar so it’s obvious it works!

Let’s get back to topics as I promised! As it just grows bigger and bigger you can make it less big by dividing the bot flow into different topics. A topic is just what is sounds, grouping similar information to a topic.

To redirect to another topic first it needs to be created, click Topics in the left side navigation

Here you can see your topics and system topics. I’ll click + New topic in the top. Give it a nice name and description then click Go to authoring canvas

There you’ll have an empty canvas to start creating new steps again!

When you are ready click Save
Ok when I want to go back to my bot, I click the topic named Greeting that I can see under System Topics, hmmm maybe I should have added so much in it… well learning by doing.
Let’s connect my question with my new topic, I’ll click the + and pick Go to another topic, in the list I’ll see all available topics.

It’s easy to see if I’m redirecting my bot to another topic

For my other answer I just want to end the “conversations” with the bot, so I’ll add and end.

But the standard ending is so boring, so I actually changed the system topic to be a bit more fun.
A super simple bot with a question, text and some links but nothing more. You can make connections to Dynamics365 but that feels too hardcore for me…
Let’s test my bot before I try to publish it to Microsoft Teams, to the left you’ll see the bot and to the right you’ll see the bot flow.

5. When the bot is ready, the next step is to publish it. I clicked on Home in the left side navigation and then Go to Publish

6. Click on Publish, this is what you click if you madev any updates any to the bot as well
7. After that you have to add it to a channel, so click Go to Channels

There you’ll get lots of options, but I choose Microsoft Teams of course, but you could also add it to for example a custom website.

Click Microsoft Teams, in the bottom there’s a button that says Add – click it!

That will generate an App ID which you’ll need later.
8. Now it’s time to jump to Microsoft Teams 🌟. First thing is to install the Microsoft Teams App Studio app

9. Once it’s installed open it

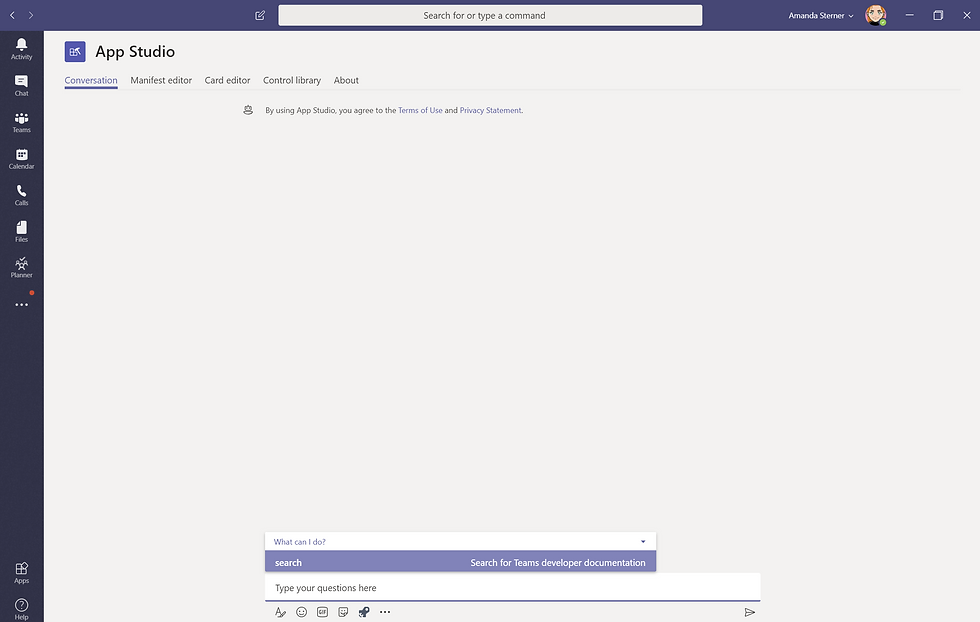
10. In the App Studio click Manifest editor
11. Click Create a new app

12. Fill out everything that is mandatory, then click Bots under Capabilities

Click Set up

Here you’ll choose existing bot and paste the App ID we got earlier

I chose Personal as scope.
13. Time to test and distribute it. Under step 3 Finish click Test and distribute

There you can first decide to try it for yourself by clicking Install

Then add it as a bot.

But I’ll be bold, download it and make it available for my tenant. When I click download my bot will be downloaded as a zip file.
14. To add the bot to everyone in the tenant you open the app store, in the bottom, you click Upload a custom app > Upload for tenant
If you can’t see this, you don’t have the right permissions or settings.

And then just choose the zip file you just downloaded.
15. Now I wanted my bot to be there for everyone in my organization and I had trouble understanding how to make my bot available to chat with for the users.
What I decided on doing in the end was to add the bot as an app by changing the app policy for Microsoft Teams. So, I added Amanda the bot and the next time Luchi logged in the bot was there to help!

I noticed that the first time a user opens Microsoft Teams after the bot was installed the bot first messages are posted until a "stop" (in my case the question" appears. Not sure how to remove that but I guess that's fine.
Another issue I had which I haven’t been able to solve is that I can’t change the name and image of the actual bot writing. But that seems to be a limitation from Microsoft at the moment 😿. Makes it look really ugly.
For a first try I’m pleased, and it was actually a lot easier than I thought.

My grade?
I actually think it’s quite easy to create a bot and make it do easy things. But I struggled with getting the bot out to everyone and also to change the name of it 😰. I hope Microsoft will make it possible to easily change this in the future inside Power Virtual Agents.
A few use cases I can see for the Power Virtual Agents are:
FAQ as replacement for an employee handbook
Bot for the IT department answering easy questions for example how to order a new computer and what models are available
Then there are a lot of exciting things to do together with Dynamics 365, but I’ll leave that for the D365 lovers to write about.
I couldn’t find when this will be in general availability. The licensing model will be decided when Power Virtual Agents comes closer to GA.
I think you should try it, if I can do it, so can you!
Link to read more
Update added 26th of January 2020
I just received my first email about my free trial being over, 1000$/month gives you 2000 sessions. This isn't optimal from my tenant where there is one use - me. I wish there were some more options.


I had the pleasure of using Softdoes for custom software application development, and I couldn't be happier with the experience! From the very beginning, their team was incredibly attentive, taking the time to understand my unique needs and vision. The final product exceeded my expectations, boasting a sleek design and seamless functionality that has truly transformed my workflow. It's refreshing to work with a company that prioritizes user experience and delivers such high-quality results. I wholeheartedly recommend Softdoes to anyone looking to elevate their business with tailored software solutions!
Giao diện là yếu tố mình quan tâm nhất khi thử một nền tảng mới, vì nếu rối thì rất dễ bỏ ngang. Ở đây nhìn tổng thể khá gọn gàng, màu sắc không quá gắt nên dùng lâu cũng không bị mỏi mắt. Khi vào từng mục thì thấy ku3933 sắp xếp nội dung khá rõ, các phần được phân chia hợp lý nên tìm nhanh. Tốc độ tải giữa các trang cũng khá ổn, không bị gián đoạn nhiều. Điểm mình thấy ổn là họ không đưa quá nhiều chi tiết lên cùng một màn hình, nên nhìn thoáng và dễ theo dõi, kể cả với người mới.